


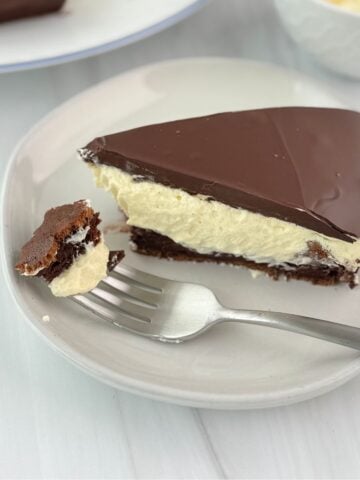
This Nutella Pie has a rich, fudgy chocolate hazelnut filling in a flaky homemade crust, finished with toasted hazelnuts for crunch. It looks like it took hours, but the filling comes together in minutes on the stovetop. If you love Nutella desserts, the Nutella Puff Pastry is another one worth trying.

Nutella Pie At A Glance
- ⏰ Total Time: 5 hours (20 min prep + 40 min bake + 4 hr chill)
- 🍽️ Servings: 8 people
- 🇮🇹 Cuisine Type: Italian / American Dessert
- 🍫 Flavor Profile: Rich, fudgy chocolate hazelnut filling in a buttery crust, finished with toasted hazelnuts and whipped cream
- 📖 Dietary Info: Contains dairy (heavy cream, butter), gluten (flour crust) - easily made gluten-free with a 1:1 GF flour blend
- 📦 Storage Notes: Refrigerate covered for up to 3 days; freezes well wrapped tightly for 6-8 weeks
- ⭐ Why You'll Love It: A show-stopping fudgy filling that looks like hours of work but comes together with a handful of pantry staples
Save And Summarize This Recipe
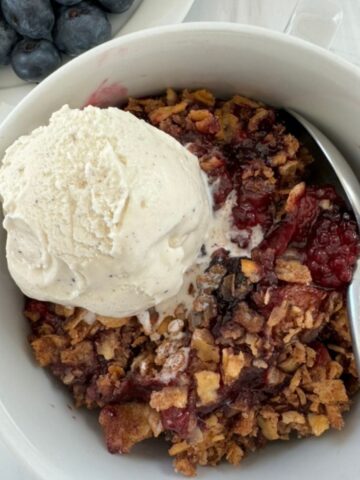
If you're a Nutella fan, this pie pairs naturally with a few other chocolate-hazelnut desserts on the site. The Nutella Ice Cream is the no-churn version for warmer months, and the Dark Chocolate Nut Clusters hit that same chocolate-hazelnut note with almost no prep. For a citrusy contrast, the Orange Chocolate Bark brings in toasted nuts and chocolate without leaning quite as rich.
Jump to:
Nutella has Italian roots, so this pie fits right alongside other Italian-inspired sweets on the site. Try the Cannoli Cookies for something simpler, or the Pistachio Tiramisu if you want another make-ahead, no-fuss dessert for company.
Key Ingredients

- Nutella - Use real Nutella here, not a generic chocolate hazelnut spread. I tested both side by side and Nutella's smoother, more pourable texture melted into the filling without any graininess. If you want to switch it up, the Milka chocolate hazelnut spread also worked well and gave a slightly less sweet result.
- Heavy whipping cream - This is what keeps the filling from setting into something dense and overly fudgy. I tested with a lower-fat cream and the texture firmed up too much in the fridge, more like a truffle than a tart. Stick with full-fat heavy cream for that smooth, sliceable consistency.
See the recipe card for quantities.
Do You Want to Save This Recipe?
Enter your email & I'll send it to your inbox. Plus, get great new recipes from me every week!
By submitting this form, you consent to receive emails from A Sweet Thyme
Variations
- Dairy-free - if you need to make this Nutella pie dairy-free, replace the butter with vegan butter and the heavy cream with canned coconut milk or Cool Whip.
- Chocolate-lover - want some extra indulgence? Make the pie crust chocolate by adding some cocoa powder to the flour! Or, add some chocolate chips or chocolate shavings to the top.
- Hazelnuts - you do not need to add hazelnuts to the top. Consider adding a hazelnut candy like Ferrero Rocher Chocolates.
How To Make Nutella Pie: Step-By-Step
Here are some quick visual instructions. Remember that full instructions with the exact ingredients are in the printable recipe card:
Crust
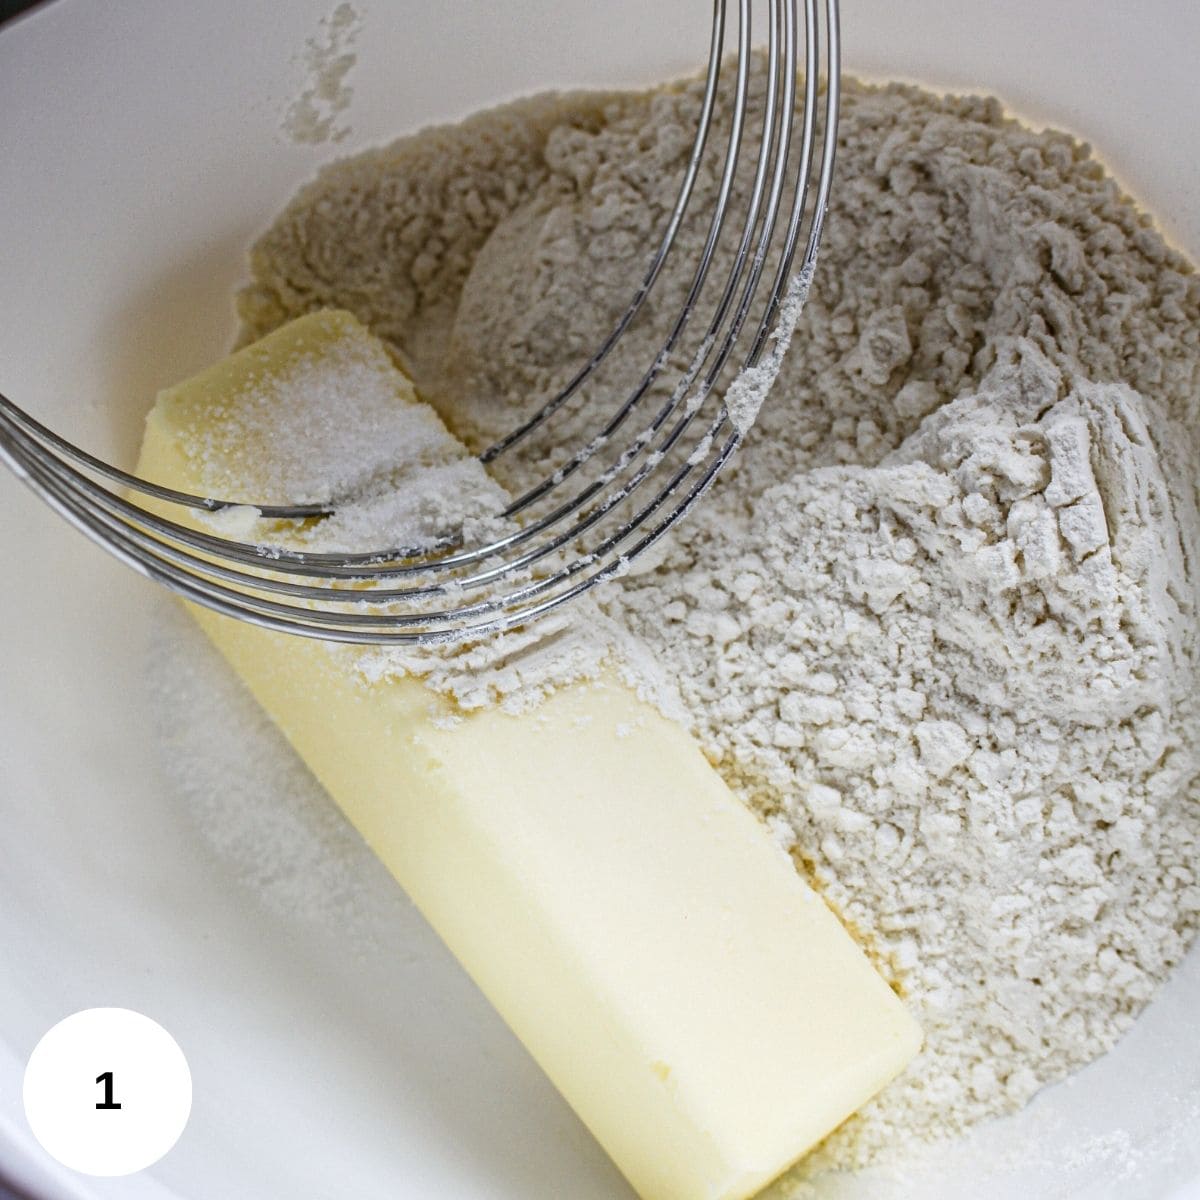
Place the chilled butter, flour, and salt into a large bowl and combine it using a pastry cutter (or other methods) until it resembles fine crumbs.
Add water until the dough comes together.
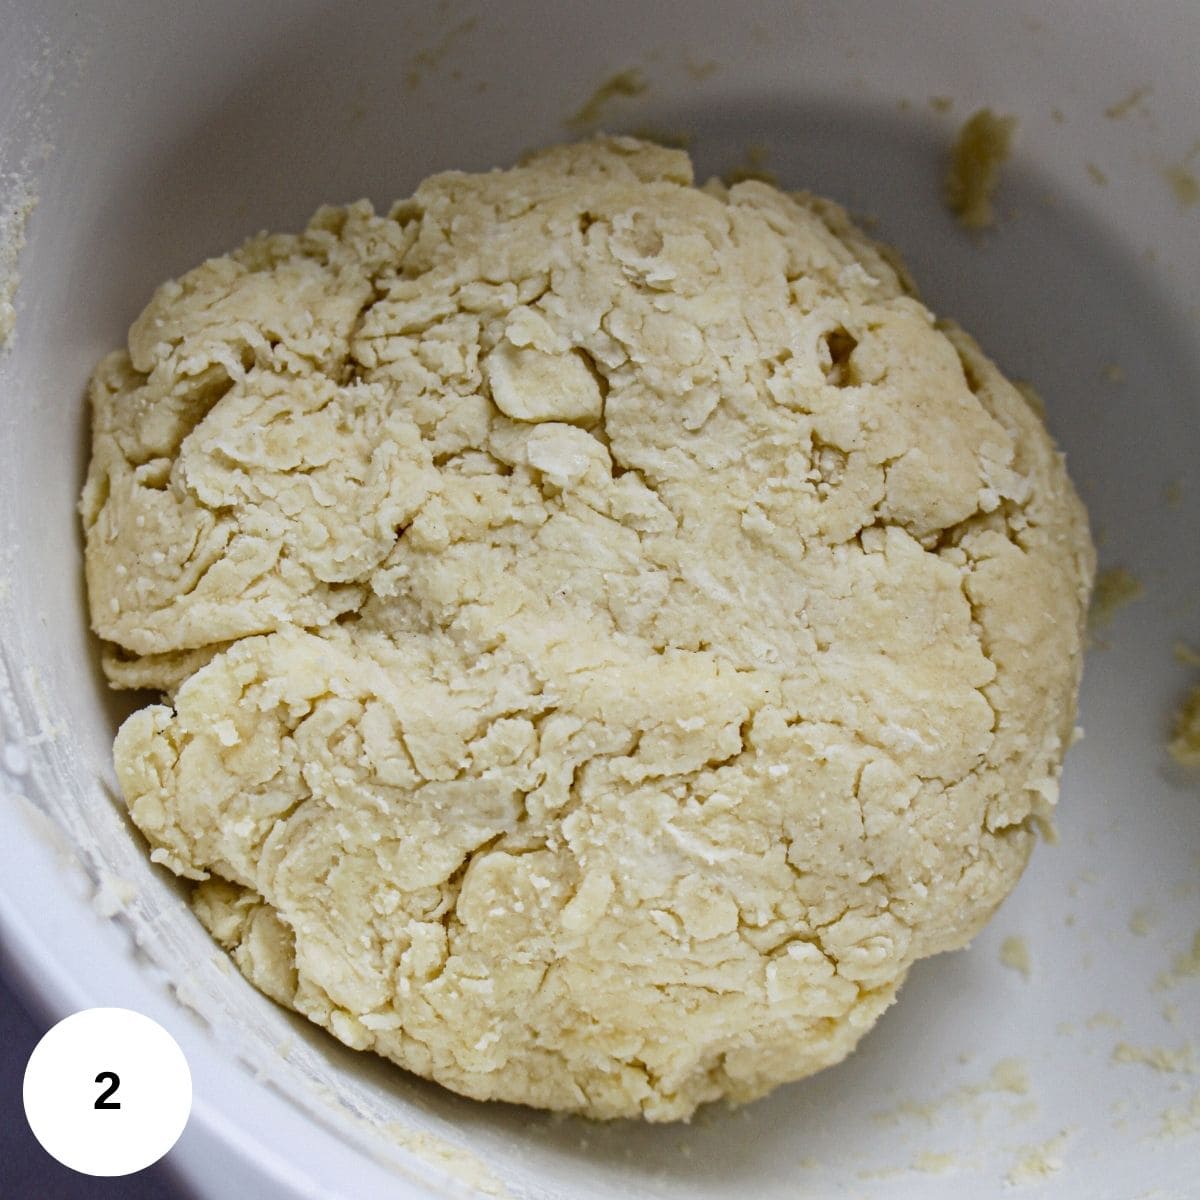
Bring the dough together into a ball.
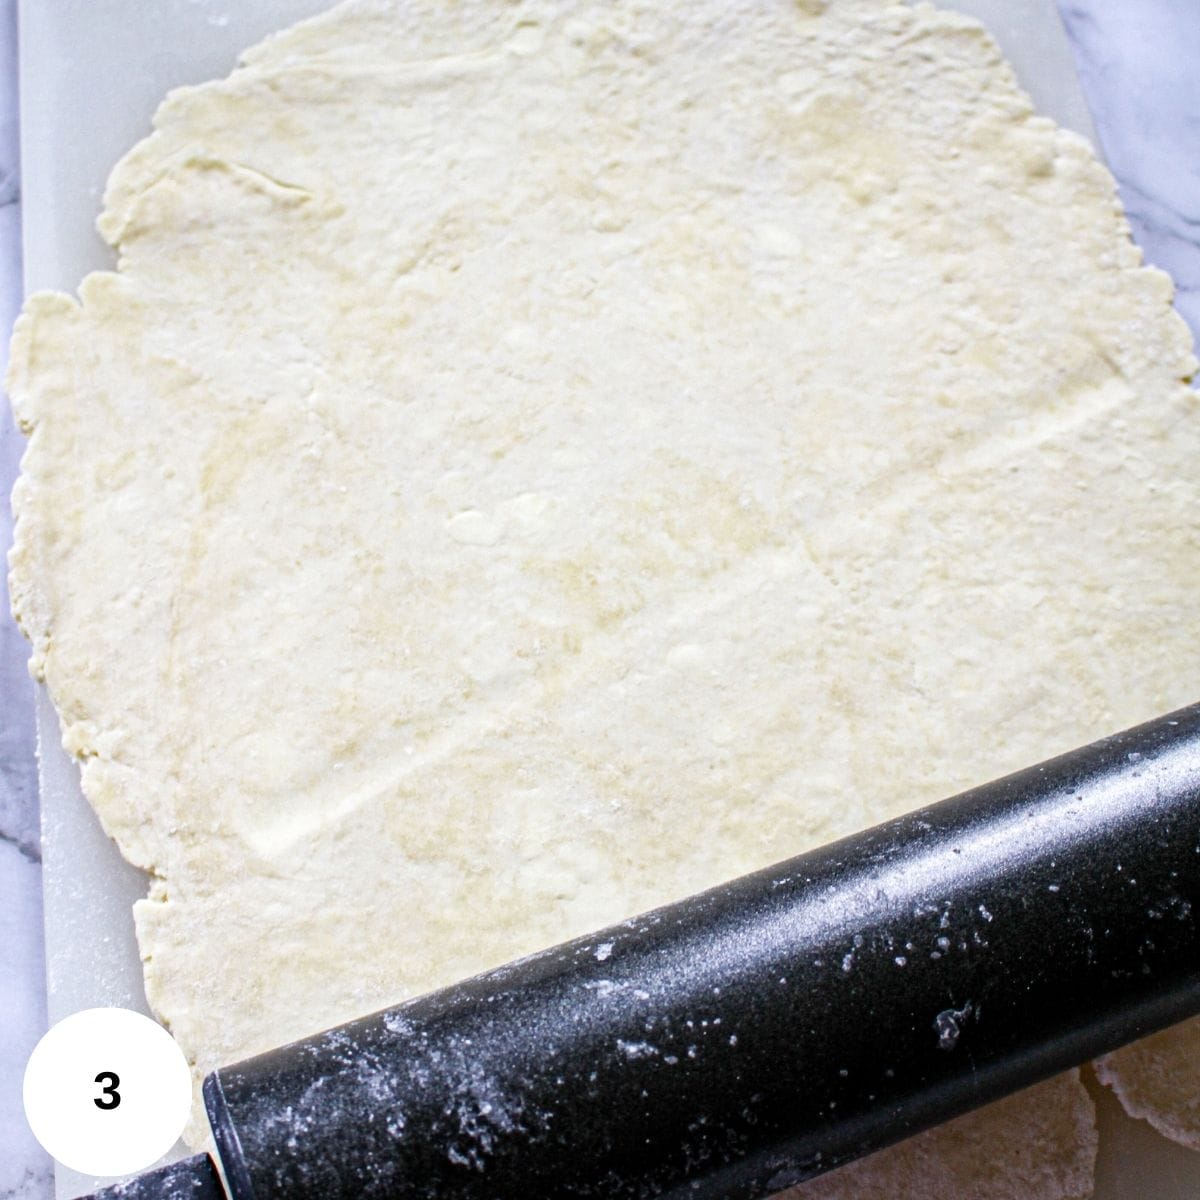
Roll the ball out into a circle, using a rolling pin, on a floured surface until it's large enough to cover a 9-inch tart pan or 9-inch pie dish.
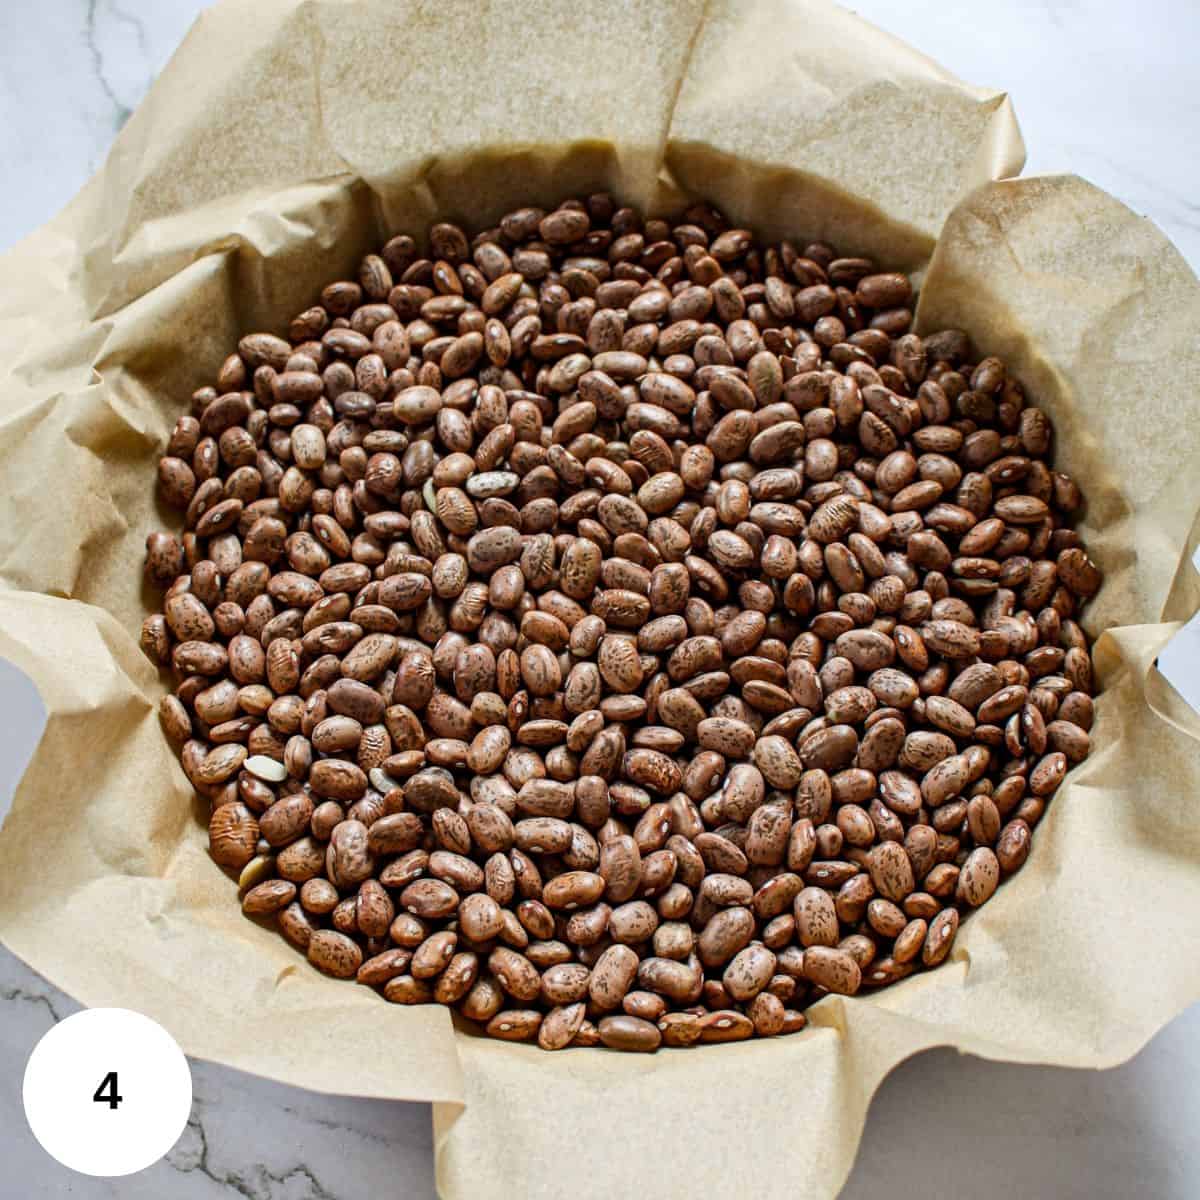
Place it into the pan and trim the edges before covering the pan with parchment paper and weighing it down with either beans, as shown above, or pie weights.
Bake the Nutella tart for 15-20 minutes, remove the parchment paper and weights, and bake for another 5-10 minutes until golden.
Remove and let the crust cool completely.
Filling

Combine the heavy whipping cream, Nutella, and butter in a saucepan over low heat.
Stir frequently until everything is melted together.

Remove from heat and pour the filling into the cooled pie crust.
Place it into the refrigerator and let it set for 4 hours.
Homemade Whipped Cream

Using an electric hand mixer or whisk attachment in your bowl of a stand mixer, whip the whipping cream, powdered sugar, and vanilla in a small bowl until stiff peaks form.
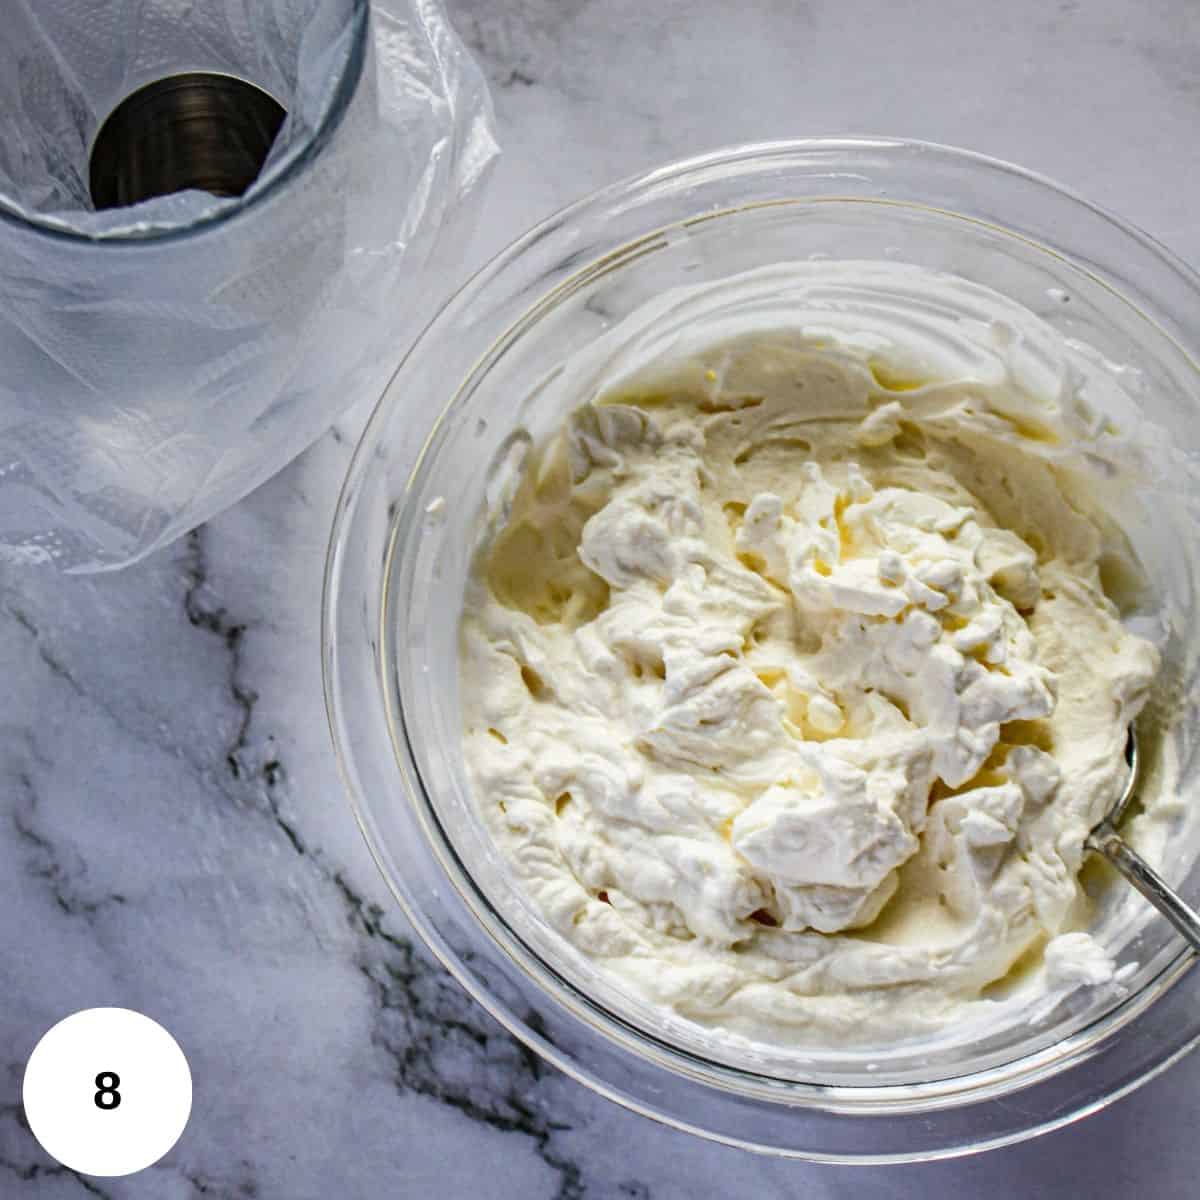
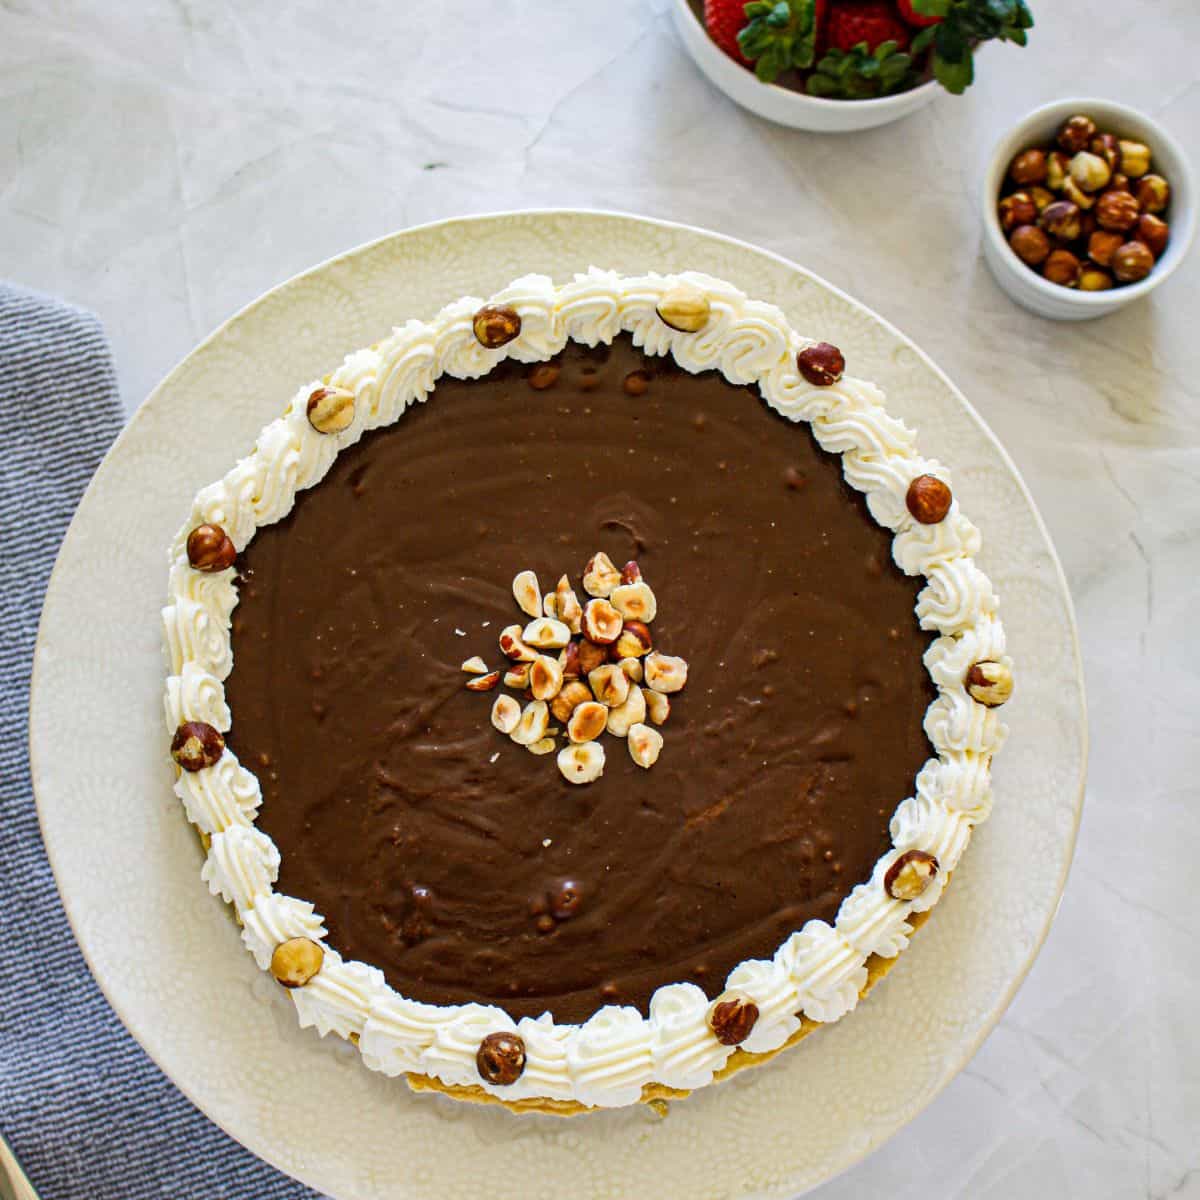
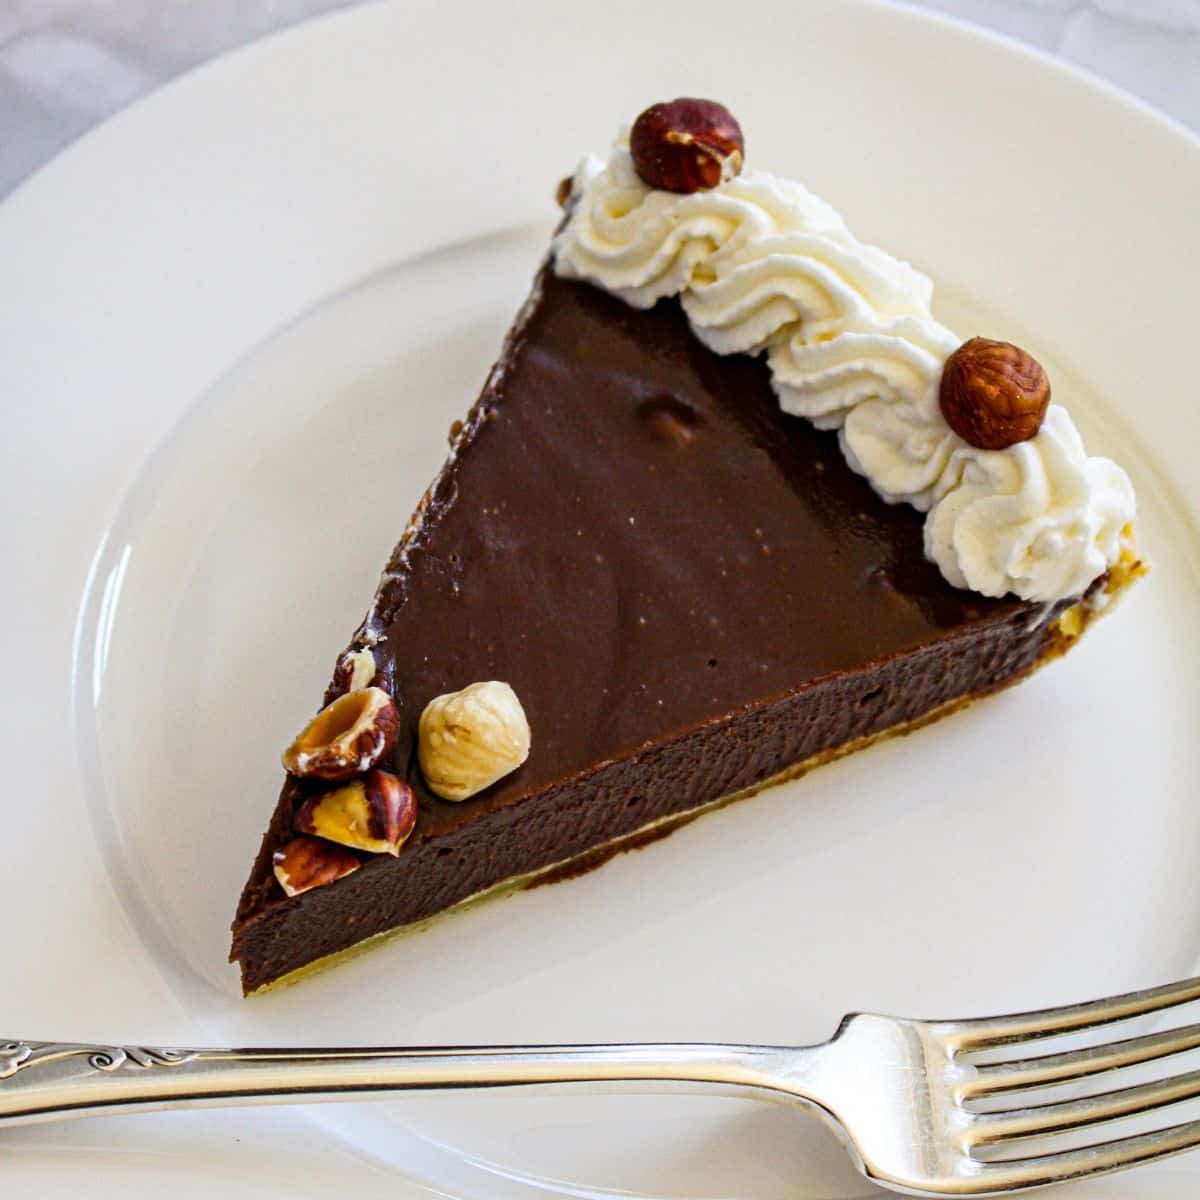
Pipe the fresh whipped cream onto the tart. (To make it look professional, use a whipped cream dispenser.)
Sprinkle the tart with toasted hazelnuts.
Hint:
- Make sure to use chilled butter for the crust as it makes a flakier texture. Crumbling works best with a pastry cutter but, in a pinch, two forks will do.
- If you find the dough is too soft when you're shaping it into a ball, place it into the refrigerator for 30 minutes before rolling it flat.
- If you don't have time to pipe on whipped topping, no problem! Just sprinkle the toasted, chopped hazelnuts for added crunch.
Gwen's Pro Tip
- You need to weigh the parchment paper down while it's covered in the oven. If you don't have baking weights, you can use dried beans.
A No-Bake Crust Option
If you'd rather skip baking a crust altogether, a chocolate cookie crust or graham cracker crust is a simple swap. Or skip the step entirely with a store-bought crust.
- 5 tablespoons unsalted butter
- 20 Oreo cookies or graham crackers
- ½ teaspoon kosher salt
Melt the butter, then pulse the cookies and salt in a food processor until finely ground. Add the butter and pulse until the mixture resembles wet sand. Press into your pan and bake for about 10 minutes at 350°F if you want the crust to set up firm.e lot better), bake the crust for about 10 minutes at 350 degrees Fahrenheit.
Nutella Pie FAQ's
Since the Nutella filling is blended with butter and whipping cream, it won't harden in the refrigerator. It will thicken into a rich, smooth, fudgy texture, which is what you want for the tart.
Yes. Prepare the pie completely, but leave off the whipped cream and hazelnuts. Store it covered in the refrigerator, then add the whipped cream and toasted hazelnuts right before serving so they stay fresh. You can also freeze the pie wrapped tightly in plastic wrap and foil for up to 6-8 weeks, then thaw it overnight in the refrigerator before topping and serving.
Nutella is a specific brand of chocolate hazelnut spread made by Ferrero, and while it's the most well-known, there are other variations on the market. Many of the variations have less ingredients or are more natural than Nutella.
More Desserts To Try

Let me know your thoughts on this Nutella Pie by leaving a star rating below or by sharing it on Facebook, Instagram, or Pinterest!
Thank you!
Gwen
Nutella Pie
Do You Want to Save This Recipe?
Enter your email & I'll send it to your inbox. Plus, get great new recipes from me every week!
By submitting this form, you consent to receive emails from A Sweet Thyme
Equipment
- 1 Whipped Cream Dispenser if you want professional looking piping on top of the pie
Ingredients
Crust
- ½ cup unsalted butter chilled
- 1 ¼ cups flour can use a gluten-free 1-1 flour
- 1 teaspoon salt
- 2-3 tablespoons water ice cold
Filling
- 1 ½ cups Nutella
- ⅔ cup heavy whipping cream
- 5 tablespoons unsalted butter
- ¼ cup hazelnuts toasted to garnish
Whipped Cream Garnish (Optional)
- ¾ cup heavy whipping cream
- 6 tablespoons powdered sugar
- ½ teaspoon vanilla extract
Instructions
Crust
- Preheat the oven to 350℉.
- Place ½ cup of chilled butter, flour, and salt in a large mixing bowl.½ cup unsalted butter, 1 ¼ cups flour, 1 teaspoon salt
- Using a pastry cutter, combine until it resembles small fine crumbs.
- Add in the water in small amounts until you have just enough for the dough to come together into a ball. (If the dough is soft, place it in the refrigerator for 30 minutes before rolling it out.)2-3 tablespoons water
- Lightly flour a hard surface.
- Roll the dough into a circle large enough to fit a 9" tart pan.
- Place the dough into the tart pan and trim the edges.
- Cut a piece of parchment paper approximately the size of your pan and place it over the top of the tart covering it completely.
- Add baking weights or beans and place it in the oven and bake for 15-20 minutes.
- Remove the parchment paper and weights.
- Continue to bake for about 5-10 more minutes uncovered until the pie crust is lightly browned.
- Remove from the oven and let it cool completely.
Filling
- In a small saucepan, combine ¾ cup of heavy whipping cream, Nutella, and butter. Stir over low heat until the butter has melted and the ingredients are incorporated.1 ½ cups Nutella, ⅔ cup heavy whipping cream, 5 tablespoons unsalted butter
- Remove from the heat and pour into the cooled tart crust.
- Place into the refrigerator for about 4 hours to allow it to completely set.
Whipped Cream Topping
- Place ¾ cup whipping cream, powdered sugar, and vanilla extract into a small bowl.¾ cup heavy whipping cream, 6 tablespoons powdered sugar, ½ teaspoon vanilla extract
- Using an electric mixer or stand mixer fitted with a whisk attachment, beat until stiff peaks form.
- Place into a piping bag or whipped cream dispenser.
- Decorate the top of the tart as desired.
- Sprinkle with toasted hazelnuts if desired.¼ cup hazelnuts
Anonymous says
Can’t wait to make this!