


These Peanut Butter Balls With Rice Krispies are the ones my Mom made for us every holiday growing up in Michigan. They have a creamy, crunchy peanut butter center dipped in smooth semi-sweet chocolate, and they take about 30 minutes and no oven. If you love my Peanut Butter Rice Krispie Treats, this is the bite-sized version you'll want for cookie trays and gift baskets.

Peanut Butter Balls With Rice Krispies At A Glance
- 🕒 Total Time: 3 hours 30 minutes (30 min prep + 3 hr chill and set)
- 👥 Servings: About 36 balls
- 🍽️ Cuisine Type: American Holiday Classic
- 🧂 Flavor Profile: Creamy, lightly salted peanut butter with a toasty crunch, wrapped in smooth semi-sweet chocolate
- 📖 Dietary Info: Contains peanuts, dairy (butter), and gluten (Rice Krispies contain barley malt). Vegetarian. Use a certified gluten-free crisp rice cereal if needed
- 📦 Storage Notes: A few days on the counter in an airtight container, about 2 weeks in the fridge, freezer-friendly (thaw in the fridge)
- ⭐ Why You'll Love It: A no-bake family classic that looks like boxed candy, makes 3 dozen, and keeps for weeks, so your holiday gifting is done early
Save And Summarize This Recipe
If chocolate and peanut butter are your favorite combination, you're in good company. My Spanish Krispie Treats bring the same crisp-rice crunch in bar form. My Peanut Butter Dates give you that salty-sweet peanut butter hit with a Mediterranean twist. If rolling and dipping is your favorite part, try my Dark Chocolate Truffles next. Same technique, a little more dinner-party energy.
Jump to:
- Peanut Butter Balls With Rice Krispies At A Glance
- Key Ingredients:
- Variations
- How to Make Peanut Butter Balls With Rice Krispies: Step-By-Step
- Helpful Tips
- Gwen's Pro Tips
- How to Dip Peanut Butter Balls Without a Toothpick
- Make-Ahead and Storage (Holiday Gift Timeline)
- Peanut Butter Balls With Rice Krispies FAQ's
- More Dessert Ideas To Enjoy
- Peanut Butter Balls With Rice Krispies
These are made for a holiday cookie tray, and they look even better when you are having company. Set them next to a stack of Peppermint Bark, a pile of Chocolate Nut Clusters, and my Haystack Clusters. That's four homemade candies, none of which needs an oven.
Key Ingredients:
You will need the following ingredients to make these chocolate balls with rice krispies:

Ingredient Notes:
- Creamy Peanut Butter - Peanut butter is the base of the filling, and the type you use decides whether your balls will hold their shape. Use a regular no-stir brand here; natural peanut butter has too much oil, and the balls won't hold together. I tested creamy and crunchy side by side. Creamy is easier to mix and rolls into smooth, even balls, so it's what the recipe calls for. Crunchy gives you more texture, and I loved it, so if you don't mind slightly lumpier balls or ones that are harder to roll, go for it.
- Rice Krispies - The cereal is what sets these apart from a classic buckeye. It adds a light, toasty crunch to every bite and keeps the rich filling from feeling heavy. I pulse the Rice Krispies in a blender or food processor before mixing. Chopped cereal blends evenly into the filling, so every bite gets that hint of crunch instead of a few big crispy pockets. One thing to know: regular Rice Krispies contain barley malt, so they aren't gluten-free. If you need gluten-free, swap in a certified gluten-free crisp rice cereal.
- Semi-Sweet Chocolate - I use semi-sweet chocolate around 60% cacao because I love dark chocolate. It's sweet enough to balance the salty peanut butter without tasting like a candy bar, but use what you love. After a decade in the chocolate industry, here's what I'll tell you about chips vs. bars. Chocolate chips are tempered when you buy them, but once you melt them, they won't set with a shiny finish. If you want that glossy, candy-shop look, melt chopped bar chocolate instead; it sets with a noticeably shinier coating. Either way, melting breaks the original temper, so expect the coating to soften a bit on your warm fingers. If you would like to learn more about chocolate, check out this resource on Dark Chocolate. If you like this melt-and-dip method, it's the same one I use for my Chocolate Cherries.
See the recipe card for quantities.
Do You Want to Save This Recipe?
Enter your email & I'll send it to your inbox. Plus, get great new recipes from me every week!
By submitting this form, you consent to receive emails from A Sweet Thyme
Variations
- Crunchy peanut butter - More texture and a bigger peanut flavor, though the balls are a little harder to roll smoothly. I tested this one side by side with the creamy.
- Gluten-free - Swap in a certified gluten-free crisp rice cereal, and check that your chocolate is gluten-free too.
- Classic buckeye look - Dip each ball partway and leave a circle of peanut butter showing on top.
- Flaky salt or chopped peanuts - Sprinkle over the wet chocolate before it sets.
- Whole Rice Krispies - Skip the blender and stir the cereal in whole for bigger, crispier bites. The filling still holds together; you will just get chunkier pockets of crunch.
How to Make Peanut Butter Balls With Rice Krispies: Step-By-Step

Step 1: In a large mixing bowl, combine the butter, peanut butter, powdered sugar, and the Rice Krispies.

Step 2: Roll them into small, approximately 1-inch balls and place them on a prepared baking sheet topped with parchment paper. Place them into the refrigerator for a minimum of two hours.

Step 3: After two hours, place the chocolate into a microwave-safe bowl. Melt the chocolate by placing the bowl into the microwave and microwaving the chocolate on high using 30-second intervals, making sure to stir the chocolate in between cycles.

Step 4: Place a toothpick into the top of the ball and coat them by dipping them one by one into the melted chocolate.
Set them on a tray lined with parchment or wax paper and let them set for an hour.
Helpful Tips
- Rewarm the chocolate as you go - If the chocolate starts to thicken partway through, microwave it for another 10 to 15 seconds and stir. Thin chocolate gives you a smooth, even coat.
- Set up an assembly line - Put the chilled balls, the chocolate, and the lined tray in a row. You'll work faster, and the balls stay colder.
- Roll with dry hands - If the filling starts sticking, wash and dry your hands and keep going.
Gwen's Pro Tips
Give the balls the full 2 hours in the fridge before you dip. Cold, firm balls hold their shape in warm chocolate and coat smoothly. Soft ones start to slump and crumble in the bowl, and that's how you end up with chocolate-covered peanut butter puddles.
How to Dip Peanut Butter Balls Without a Toothpick
A toothpick leaves a small hole on top, so a fork gives you cleaner, fully coated chocolate balls.
- Use a dinner fork or a candy dipping fork. A dipping fork is a nice upgrade, but you don't need one.
- Work with cold balls only. Pull out a few at a time and keep the rest in the fridge.
- Coat it, don't stab it. Drop the ball in, roll it with the fork, then scoop it up from underneath.
- Tap off the extra chocolate. Tap the fork on the rim two or three times. This keeps chocolate from pooling into a "foot" around the base.
- Slide it off. Tilt the fork over the parchment and nudge the ball off with a second fork or a butter knife.
Make-Ahead and Storage (Holiday Gift Timeline)
| When | Where | How Long |
| Up to 1 week ahead | Refrigerator, airtight container | About 1 weeks |
| A few days ahead | Counter, airtight container | A few days |
| Further ahead | Freezer, airtight container | Freezer-friendly; thaw in the fridge before serving |
| Day of serving | Room temperature | They can sit out for hours |

Peanut Butter Balls With Rice Krispies FAQ's
You can swap the peanut butter in crispy buckeyes for sunflower seed butter to make them nut-free. Remember that you need to find a nut-free butter that isn't oily and is pre-stirred for the recipe to work.
It is the result of water, in the form of dampness or condensation, that interacted with the chocolate. Allow the container of buckeyes to come to room temperature on the counter before enjoying.
More Dessert Ideas To Enjoy
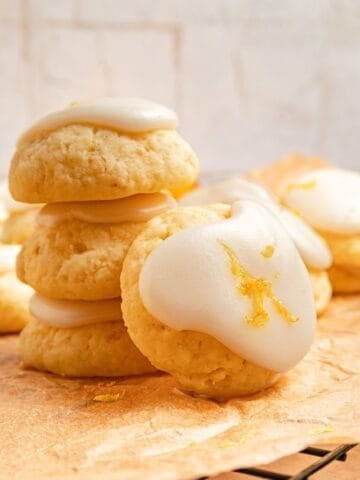


This easy candy recipe will be a surefire hit on your Holiday cookie tray and a huge hit with your family and friends. Using a handful of ingredients, these chocolate-dipped peanut butter balls are the best buckeyes you will ever eat!

Let me know your thoughts on these Peanut Butter Balls With Rice Krispies by leaving a star rating below or by sharing it on Facebook, Instagram, Flipboard, or Pinterest!
Thank you!
Gwen

Peanut Butter Balls With Rice Krispies
Do You Want to Save This Recipe?
Enter your email & I'll send it to your inbox. Plus, get great new recipes from me every week!
By submitting this form, you consent to receive emails from A Sweet Thyme
Equipment
Ingredients
- 8 tablespoons unsalted butter softened
- 2 cups creamy peanut butter
- 3 cups Rice Krispies chopped in a blender or food processor
- 1 pound powdered sugar
- 24 ounces semi-sweet chocolate chips or two bags 12 ounces each
Instructions
- In a large mixing bowl, combine the butter, peanut butter, powdered sugar, and Rice Krispies.8 tablespoons unsalted butter, 2 cups creamy peanut butter, 3 cups Rice Krispies, 1 pound powdered sugar
- Roll them into small 1-inch balls and place them on a prepared baking sheet topped with parchment paper.
- Place them into the refrigerator for a minimum of two hours.
- After two hours, place the chocolate into a microwave-safe bowl.24 ounces semi-sweet chocolate chips
- Melt the chocolate by placing the bowl into the microwave and microwaving the chocolate on high using 30 second intervals, making sure to stir the chocolate in between cycles. Or, using a double boiler, place the chocolate into the top and melt stirring constantly.
- Place a toothpick into the top of the ball and coat them by dipping them one by one into the melted chocolate.
- Set them on a tray lined with parchment or wax paper and let them set for an hour.
Linda R says
These look delicious but they are not gluten free, They contain barley malt. To be gluten free you would have to substitute with an alternative brand of cereal.
Gwen Wolken says
You are correct! I have been going through my recipes and updating them. I haven't updated this one but I did go back and take out the GF references for now.
Anonymous says
Yum!